Author: imoliveira88

  • History, grep, piping and something else: a true case

    How many times did someone give you the task “this system doesn’t have documentation, it had a failure and stopped and we don’t know how to put this system up again… help us!”?

    It’s quite common when the knowledge management is not taken seriously inside the company and you have only weak documentation. The problem worsens when you have to handle legacy systems. Rely on me: i know what i’m telling you, so i give you my shoulder.

    But calm down. If you have a terminal and you can access the machine where the system should be running, maybe we shall solve everything.

    1. history

    The history command really can save your life. It lists the last commands typed in the Linux terminal, by the current user.

    So, in case you need access the list of commands typed by another user, please follow the sequence:

    sudo su
    su - user_who_typed_something_good
    history
    

    It’s suitable to say that when you type “su – user” you change the current user to user, but, more than that, you’ll be transported to his home directory with all of his environment variables and shell environment.

    2. fc

    It stands for “find command” and it will show you all the executed commands between two positions, like fc -l 100 200 that will show you the last commands between the positions 100 and 200.

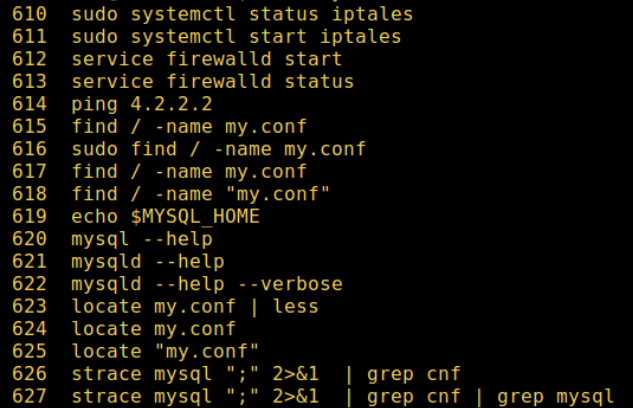
    Now, i think we know a lot about these commands and it’s time to dive deeply and see a practical case. Let’s see what the history command give us:

    Unfortunately often we have to scroll too much and we lose time (and eyes) doing that. If for example, we were looking for the occurrences of commands with the expression “fetch” we could, more wisely, use our famous grep command in order to pipe and filter the result of the history command:

    history | grep fetch
    

    Et voilà!

    As of now, don’t forget: if you use an OS based in Linux, history and grep could save your life. Once upon a time, they saved mine.

    Happy coding!
    — Igor Magalhães Oliveira

  • Understanding the Importance of Version Control in Programming

    Version control tools are indispensable for professional programming teams. Whether you’re collaborating with a team or working solo, integrating version control tools like Git is a fundamental practice.

    By embracing version control tools like Git, you gain a comprehensive history of your project’s development. This enables you to accurately measure future efforts, provide better estimates, and recover working code in case of errors.

    Let’s delve into the usage of Git’s command-line interface:

    1. git init

    Initializes an empty repository in the current folder, marking the beginning of your version control journey.

    2. git branch master

    Creates a new branch named “master,” representing a distinct line of development within the codebase.

    3. git checkout feature_button

    Allows you to switch to another branch for work, with the option to create a new branch using the “-b” parameter.

    4. git add

    Adds files to the staging area, preparing them for commit. Using “git add .” adds all new and modified files to the staging area.

    5. git commit -m “fix: it was fixed this and that”

    Saves changes in the repository with an intelligible commit message summarizing the changes.

    6. git log –oneline

    Provides a concise summary of all commits in the repository, enhancing visibility and tracking.

    7. git status

    Offers insights into the current state of the repository, including the current working branch and staged files.

    8. git config

    Sets up essential variables for working with remote repositories, ensuring seamless collaboration. Commands like git config --global user.name "yourname" and git config --global user.email "youremail@example.com" are crucial.

    9. git merge master

    Integrates branches together, a common practice but one requiring careful attention due to potential conflicts.

    10. git remote add origin https://github.com/imoliveira88/repositorio

    Establishes connections with remote repositories.

    11. git clone https://github.com/imoliveira88/repositorio.git

    Clones a targeted repository into the current folder.

    12. git pull https://github.com/imoliveira88/repositorio master

    Fetches and merges content from the remote branch to the local current branch.

    13. git push https://github.com/imoliveira88/repositorio master

    Sends content from the local branch to the remote branch.

    Final Thoughts

    Incorporating version control tools like Git streamlines development processes, fosters collaboration and ensures project integrity.

    Happy coding!
    — Igor Magalhães Oliveira

  • Linux command line crash course: main introductory terminal commands

    ln the Information Technology world is quite common to face Linux systems, either because it’s “cheaper” to keep Linux server with good security tools, or because it provides the user a more complete control of the operating system.

    Regardless the motivation behind the choice for using Linux systems, it’s an obligatory requirement to the IT professional know how to use, even a little, the Command Line Interface. I’ll help you with that, giving you a minimal set of “have to know” commands.

    1. ls

    It stands for “list”. Yes: it simply lists the content of the current folder, showing you files and folders.

    ls -l

    It shows everything in a “long format”, providing informations about permissions, ownership, size, etc.

    At the image above, “r” stands for “read”, “w” for “write” and “x” for “execute”, permissions. We have three blocks with those permissions, each one containing the sequence “rwx”: the first block corresponds to the permission of the owner; the second, permissions of the owner’s group; finally, the third, other users’ permissions.

    ls -lh

    Similar to the previous one, but it shows sizes in a “human” readable shape, showing unities like “MB”, “KB”, and so on, instead of “bytes”. Pay attention to this “h” in linux, because almost always it stands for “human readable”.

    ls -a

    It shows all, including hidden files and folders.

    ls ..

    It shows the content of the parent directory. Pay attention to the two dots: it will always represent the parent directory.

    2. pwd

    It stands for “Print Working Directory” and it’s exactly what this command does.

    3. cd

    It allows you to “enter” in the specified directory.

    cd ..

    It puts you in the parent directory.

    cd ~

    It puts you in the current user’s home.

    cd –

    It’s a magical command that takes you to the previous visited directory. Realise the difference between it and “cd ..”. Look the image below:

    Did you get it?

    4. mkdir

    It creates a specified directory

    5. cp

    It copies a file or directory. In the case of directories, you have to add the parameter “-r” in order to do the copy recursively.

    6. mv

    It moves a file or directory to another location. We may use mv command to provide a simple strategy to turn a specified file as a hidden file, like that:

    mv file.txt .file.txt

    When you have a file name starting with a dot in Linux, it means it’s a hidden file.

    Did you get it?

    Friends, for now it’s all! I hope you liked! Keep in touch for suggestions!

    Happy coding!
    — Igor Magalhães Oliveira